
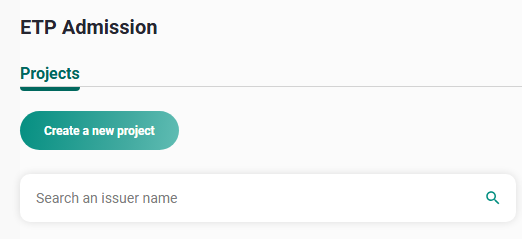
ETP Admission - Amsterdam, Brussels, Dublin, Lisbon, Oslo and Paris - Create a new project
To create a new listing project, click the “Create a new project” button on the “Projects” tab.
1. Create a new project
When creating a listing project for Amsterdam, Brussels, Dublin, Lisbon, Oslo or Paris, you will be asked to fill in the following information:
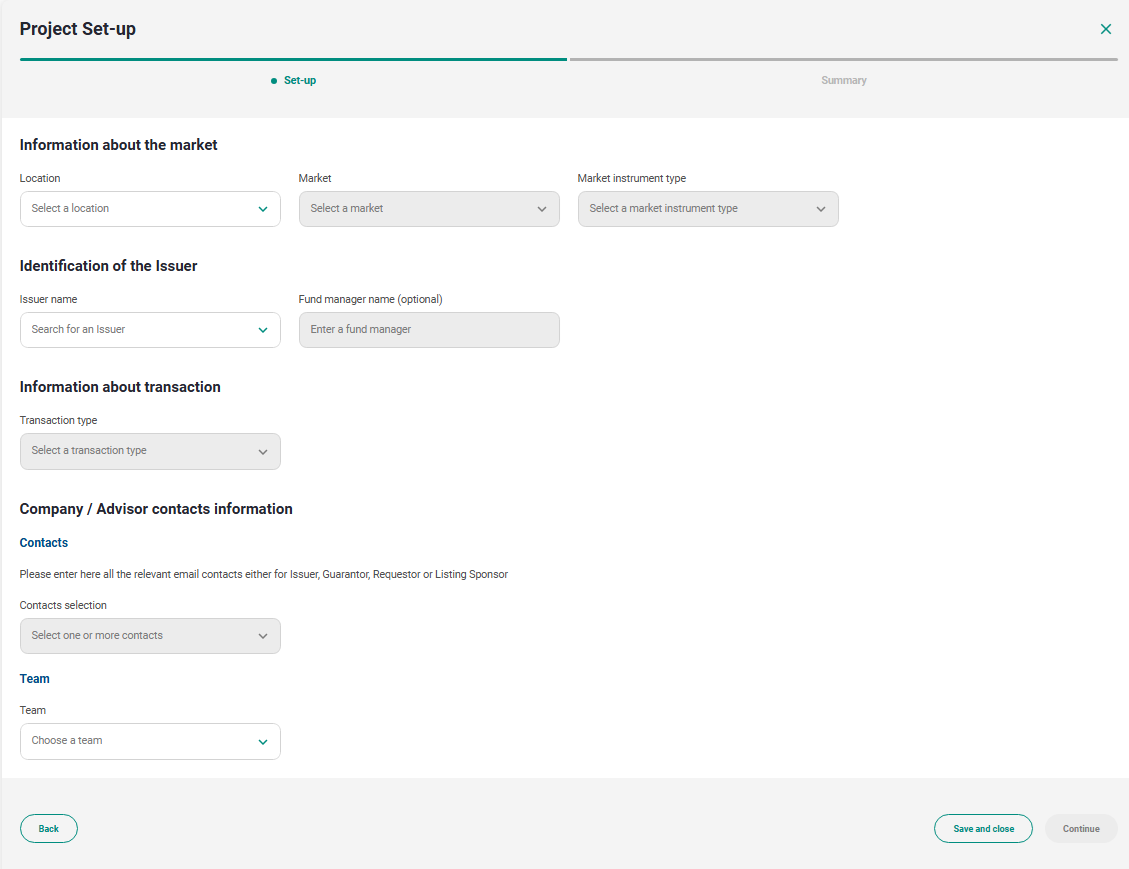
2. Project Set-up
Choose the Location, Market, Instrument type, Issuer name and Transaction type, then enter the relevant contacts for the project.
Click "Continue". A summary of your information will be displayed. You can either:
- Go back and edit some information if needed
- Save and close the request: it will appear as a "Draft" on the project list
- Create the project: The project folder will be created, and the project will appear as "Ongoing" in the project list.
Once the project has been created, the Project status is "Ongoing" and the Assessment phase begins.
Project folder
This is how the project folder looks like when a project is created:
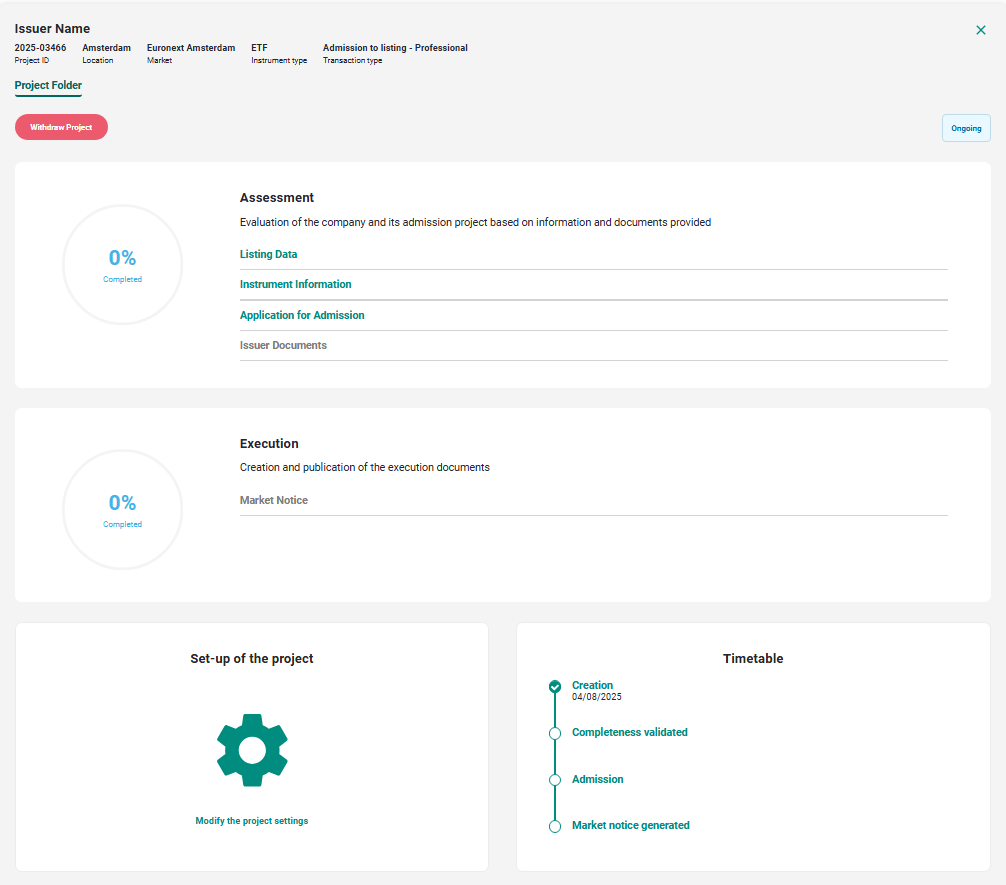
3. Project Folder
Assessment phase
Listing Data
To initiate the assessment phase, click on "Listing data" on the project folder to enter the general information about the listing. Once it has been done, click on Validate.
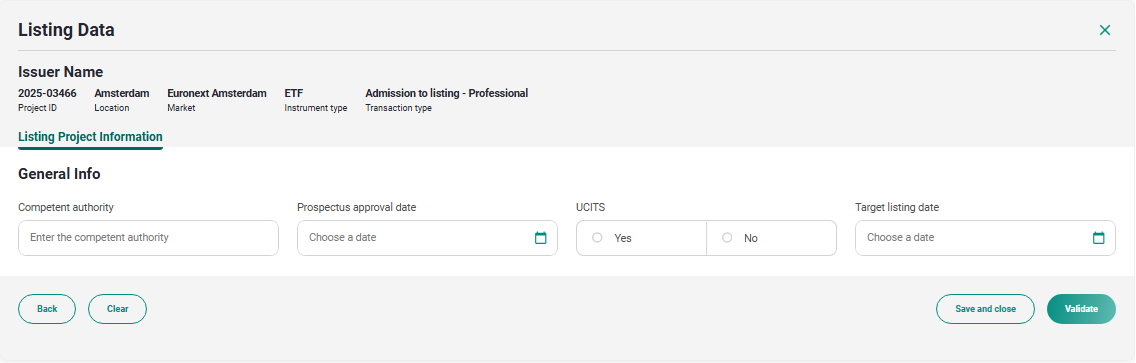
4. Listing Data
Instrument information
Instrument information can be uploaded in a .CSV format to facilitate the process of entering data on the platform.
Download the .csv generator, fill it in with the right information and upload it back onto the platform as shown in the screen below:
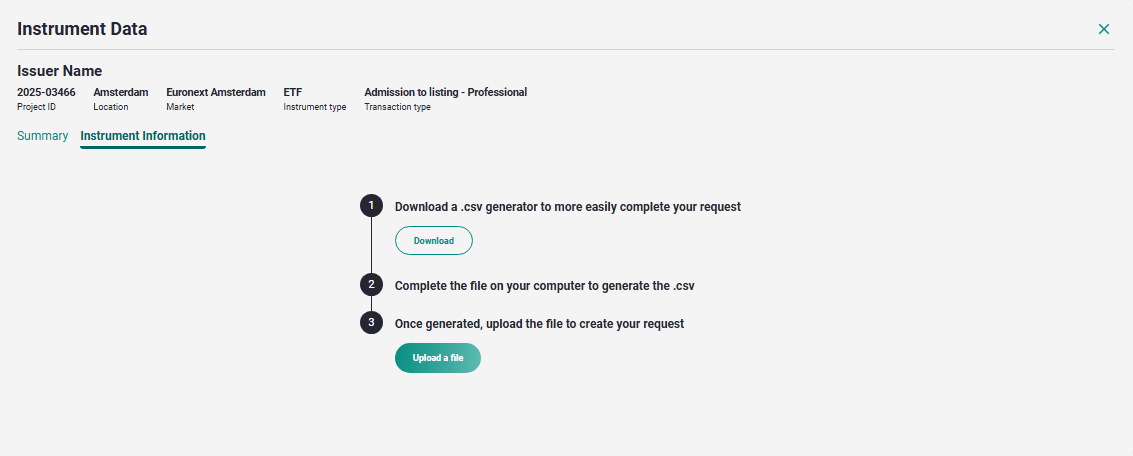
5. Instrument Information download
You will need to enable the embedded Macro to allow the csv generation. To do so, right-click on the file and select “Properties”, and in the “General” tab, tick “Unblock”.
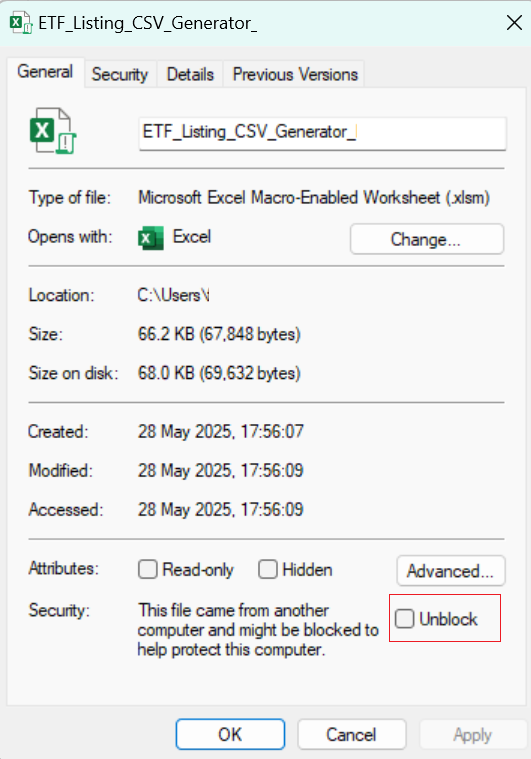
6. Macro Unblock
Open the downloaded file and start filling it in. You can type the values manually or use the dropdown list of values when available.
Once the file is completed, click on Generate CSV to save the version of this version of the file, ready to be uploaded on the application.

7. csv generator
The data is then automatically converted to a table (see example below), which you can either save as a draft or validate. Euronext will receive a notification and will review the form.
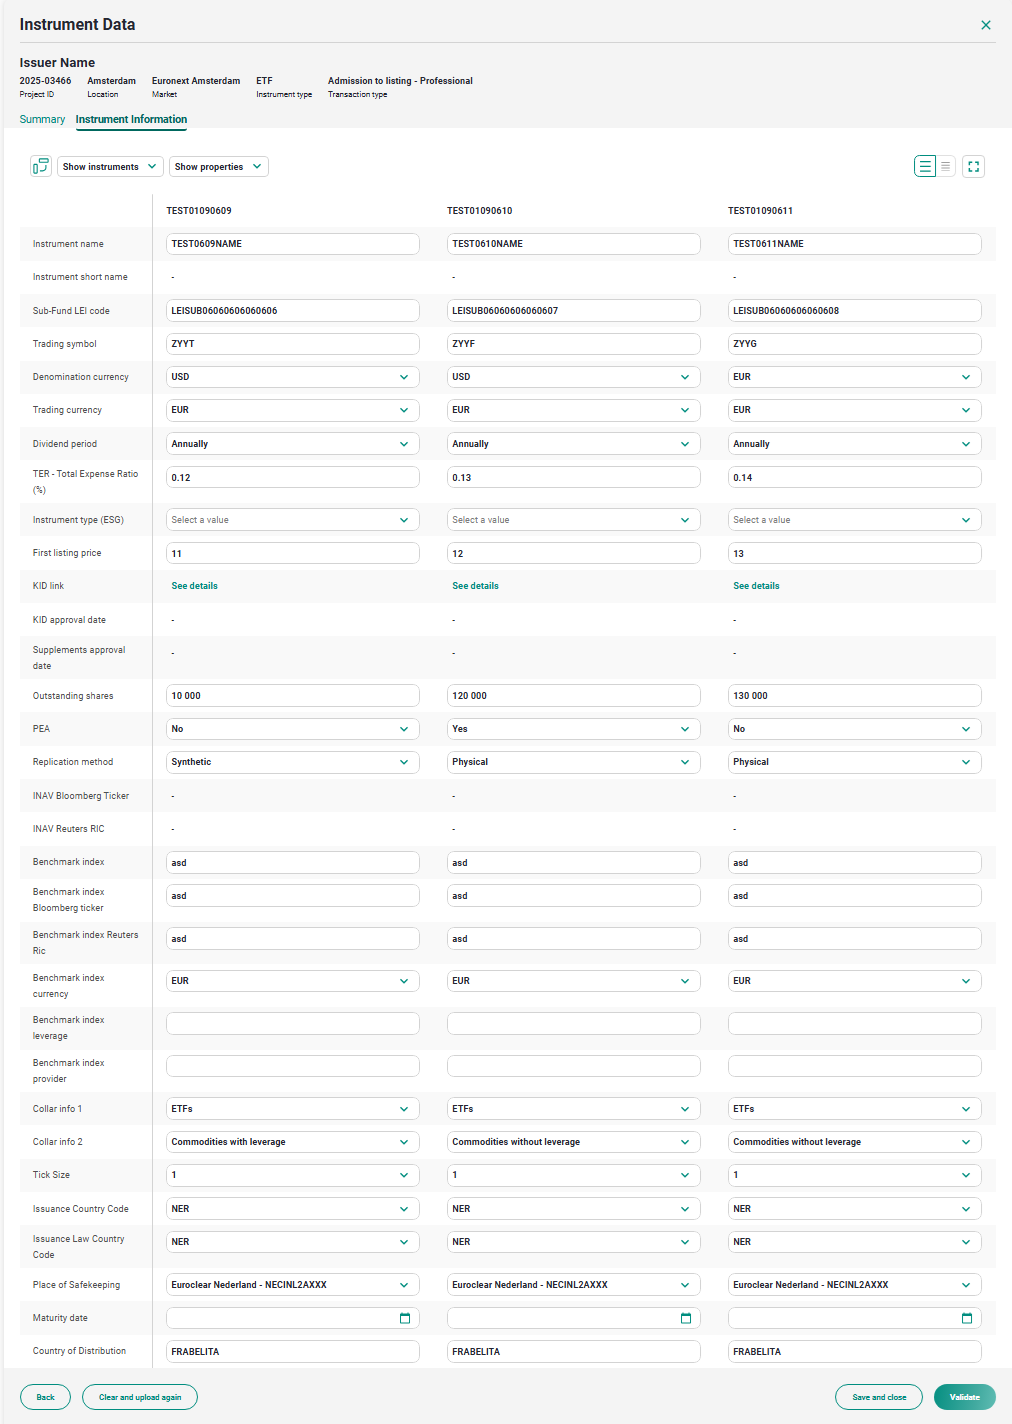
8. Instrument Information
When Euronext has validated the form, you will see a notification on the top of the page.
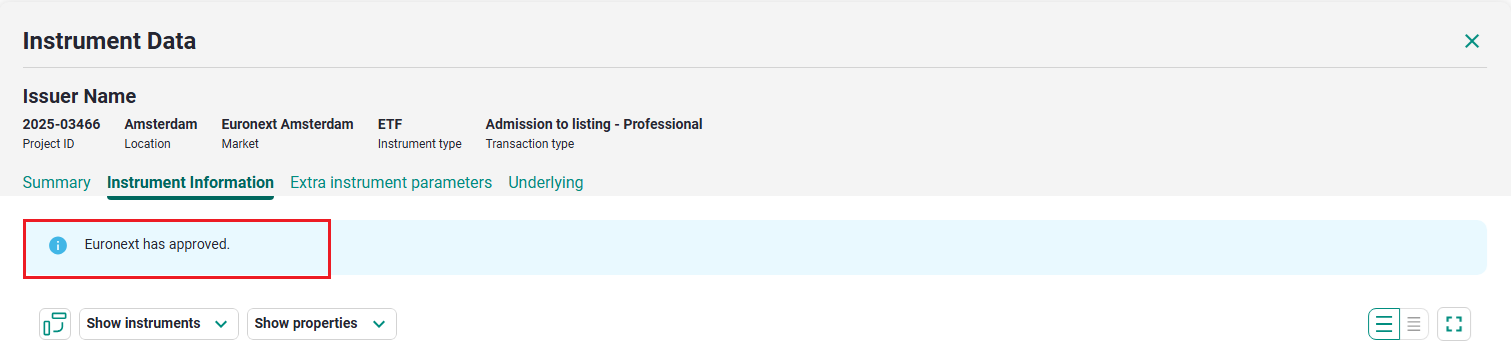
9. Instrument Information approval banner
Application for Admission
You must fill the Application for admission and have it signed by the correct issuer contacts.
You should follow the signature process as detailed below. You will then be able to validate the form and submit the form to Euronext when finalised.
Fill in the following fields:
- Name of the Authorised: will be the person who will sing in the form
- Title
- Phone
- email: will receive the email to sign the form
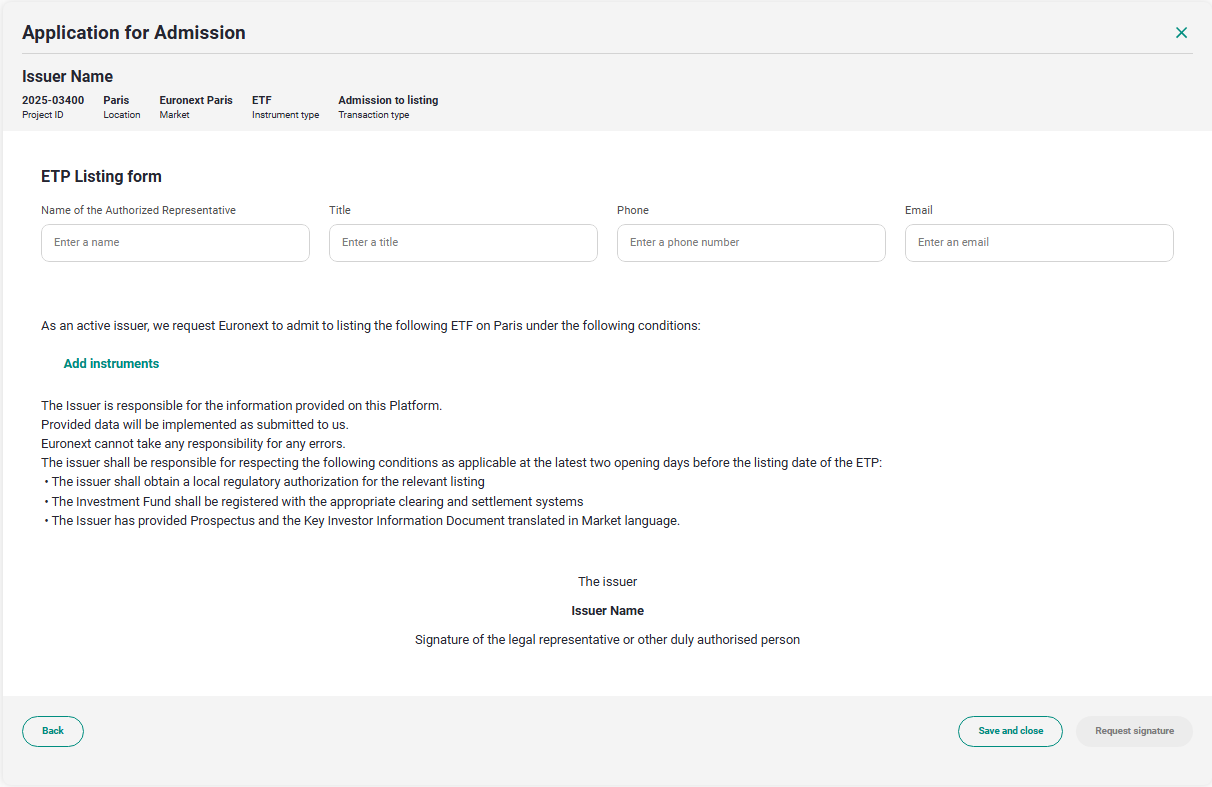
10. Application for Admission form
Clicking on "Add Instruments" you will be able to add all the ISINs in the listing project perimeter, with the linked Instrument Name and Currency.
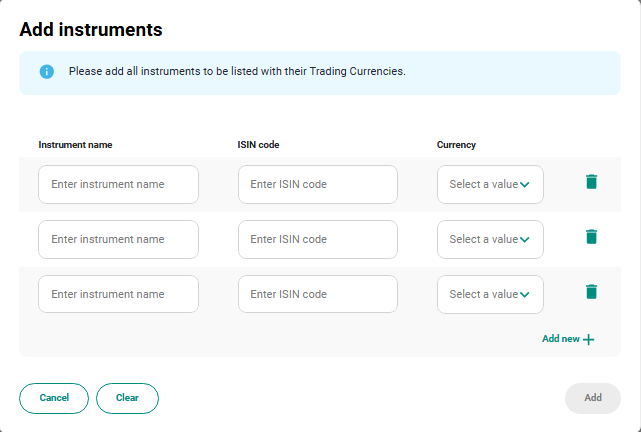
11. Application for admission - Add instruments modal
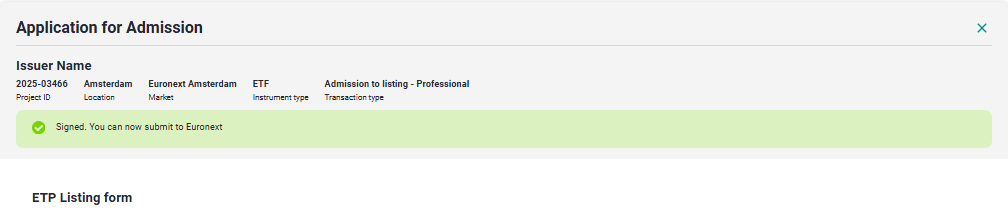
Click on Request Signature to have the designated signatory receive an email from DocuSign. The signatory must then follow the link in the email to review the application for admission and sign it electronically.
Once the application has been signed, submit the application for admission clicking on Submit to Euronext.
The application will be reviewed by Euronext, and validated if correct.
12. Submit to Euronext banner
Issuer Document
As a client user you will need to upload the required documents through the Issuer Documents interface.
You need to upload all the necessary documents, select them by checking the box next to each document, or the Select all checkbox, and then click the Submit button.
The mandatory documents are the following:
- Prospectus
- Evidence that the prospectus has been validated/passported by the competent authority
- KID translated in the language of the targeted market
You need to complete and submit the form according to the Market you chose at the beginning of the project creation:
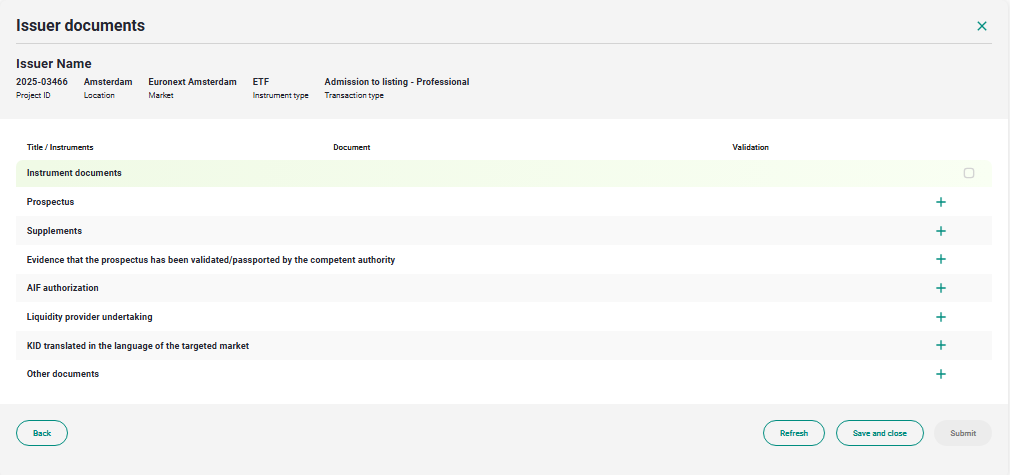
13. Issuer Document section
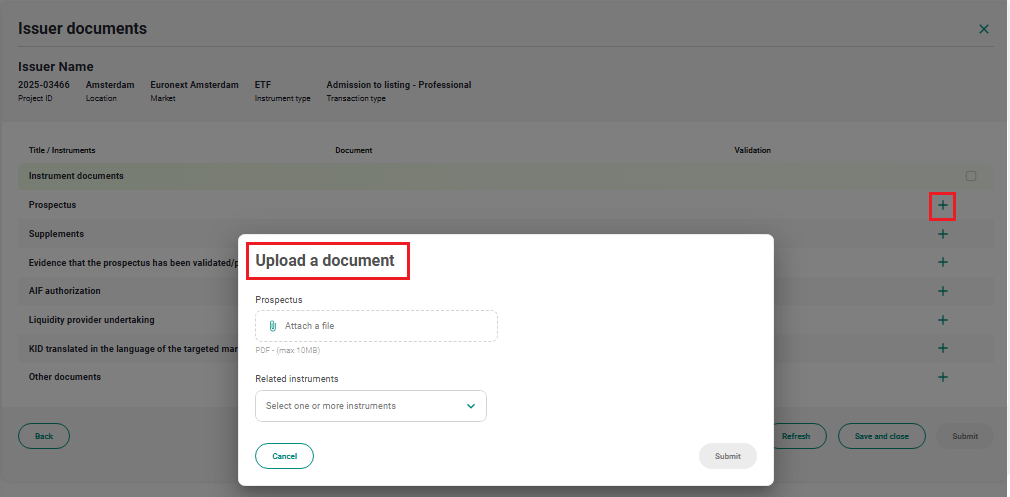
Click on "+" to open the upload document modal, and attach the file you want to upload. File size cannot be over 10 MB.
14. Upload document modal
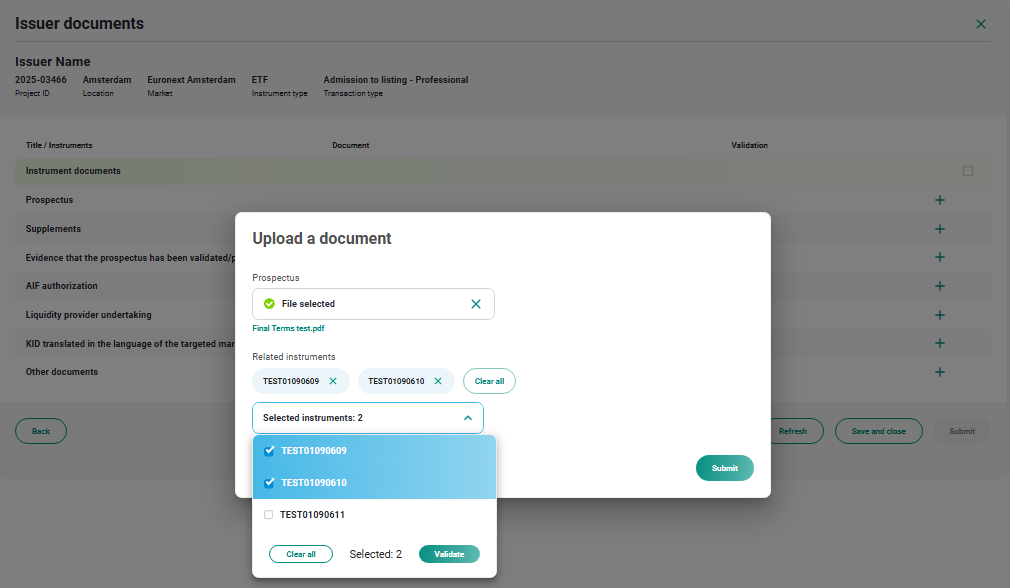
For each uploaded document, you must define the linked ISIN. More that one ISINs can be linked to the same document.
15. Upload document - Linked ISIN
Anytime a document is uploaded, the antivirus scan will run on the files. To check the document status click on "Refresh" button and if the file is clean, a green flag will appear next to the document.
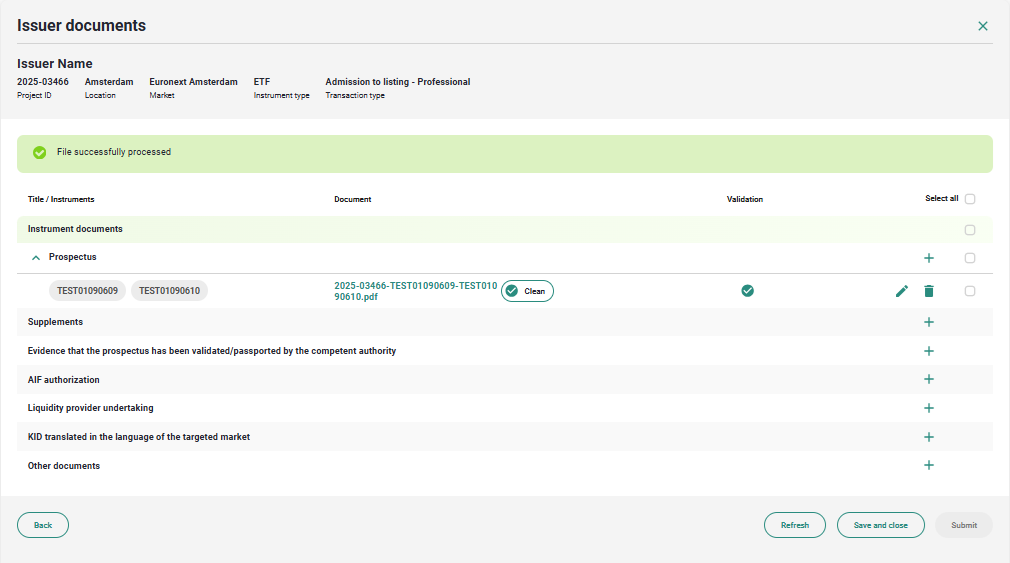
16. Issuer Document - Antivirus
When the antivirus scan is finished, select all the documents you have uploaded flagging them one by one or using the "Select all" flag. The Submit button will be enabled, click on it to submit to Euronext for validation.
When Euronext operator validated all the steps of the Assessment Phase, the project status is "Admitted".
Execution phase
When the project is completed, the status will turn to "Executed" and the Market Notice will became available.